Superset Heroku Installation – Microsoft SQL Server Database Connection on Windows PC
- Clone this github repository into YOUR OWN repository
- and Edit the link in the Readme.md file from https://www.herokucdn.com/deploy/button.svg)](https://heroku.com/deploy?template=https://github.com/dugjason/superset-on-heroku to the link in YOUR OWN CLONED repository eg. https://www.herokucdn.com/deploy/button.svg)](https://heroku.com/deploy?template=https://github.com/benadaba/hrmr
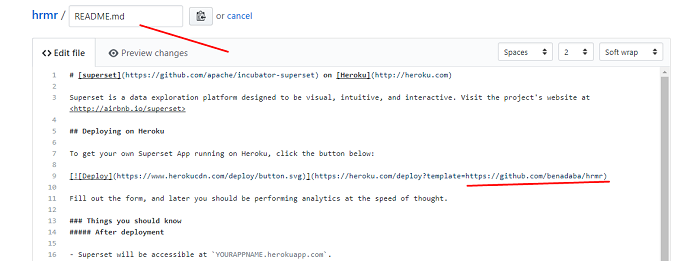
- Now scroll down and COMMIT (save) the changes
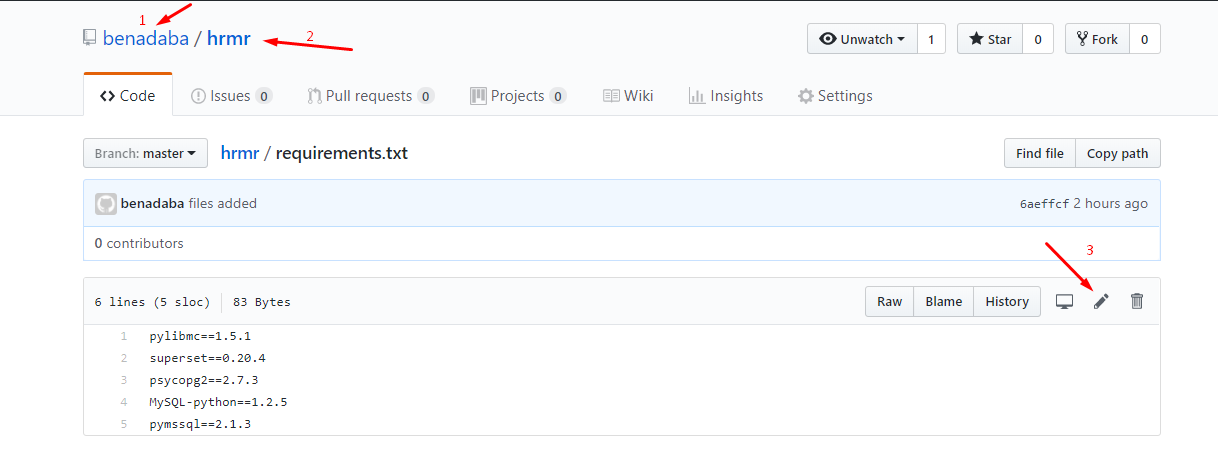
- ALSO edit the requirements.txt file and include any database requirements you want installed . eg pymssql==2.1.3, pyodbc==4.0.21 (this version was generating an error , so you can search a version which will work for you)
- ALTERNATIVELY you can follow the GIT steps here to create empty repository in your ONLINE GITHUB , then create a LOCAL git repository on your own local computer and clone the files this repository into the local repository , THEN edit the LINK as above and ALSO add any database requirements you need example pymssql==2.1.3, pyodbc==4.0.21, etc all LOCALLY and PUSH the changes BACK to YOUR OWN online GIT repository.
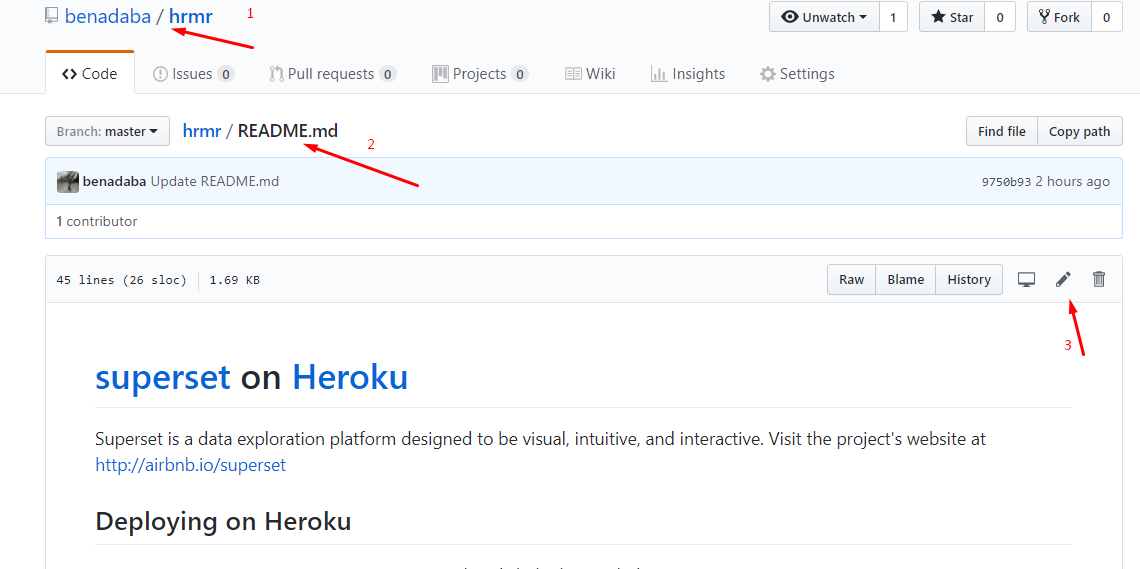
- Now , you can GO to YOUR OWN online github page eg Go to github page: https://github.com/benadaba/hrmr and then start your superset heroku installation
- (THIS MEANS, YOU CAN ADD ANY REQUIREMENTS OR CHANGES YOU want to the runtime.txt and other files before actually using the ONE-CLICK install . This is because sometimes once they are installed on heroku, it is a bit combursome to effect changes to them. But be sure, you know what you are doing before you do any changes to these files)
- Follow instructions and use the one-click button to install the superset on heroku.
- Follow Heroku onscreen instructions to install.
- Once installation is complete come back to the this (YOUR CLONED GITHUB REPOSITORY VERSION ) page https://github.com/benadaba/hrmr and follow the “After deployment” instructions. You can CLONE to a NEW LOCAL directory or same one if you use the ALTERNATIVE method above
- When you face the error ‘You appear to have cloned an empty repository’ visit this page to solve the ‘You appear to have cloned an empty repository’ when using `heroku git:clone`
- After cloning to your LOCAL repository . Follow the steps here https://github.com/benadaba/hrmr to create an admin USER
- After you create your Admin user , you can now log into your app and start configuring to your requirements
- IF you want to MAKE further changes once you app is live, you will have to do that via heroku git
- Follow instructions in the DEPLOYING WITH GIT here on how to make changes locally and push to heroku git
- For an existing heroku app ( which will in our case , since our app is already existing ) we can set our LOCAL directory where we will be making the LOCAL changes to point to the heroku git as described here
- Before you can push changes you will first have to add the changes, by using git command “git add .”
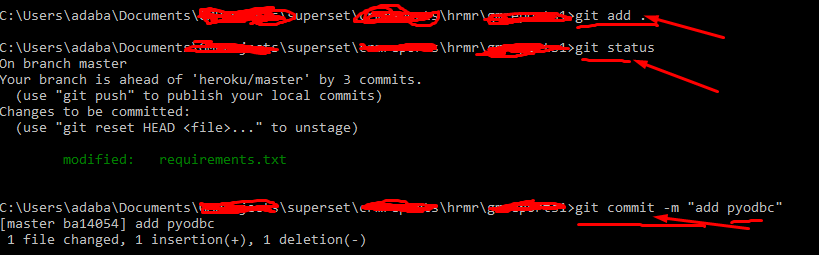
- You can check the status after adding any changes by git , using the “git status” command
- Then you will have to commit the changes using “git commit -m [message for the chanage] “
- Then push your changes to the heroku master.
Hope this helps.
Want more information like this?