
Connect Push Commit Pull Your GitHub Repository To Your Local Computer’s Directory
Introduction
Github is a web version control system which is very useful when you are working on various projects or you want to keep track of changes you make to your project over time. It is a very useful tool as you venture into Data Science and Programming
Objective
After you have created a few repositories and Github and you can start working on projects, you would prefer to make changes to your code and update the changes on your Github repository without you having to copy and paste large codes from your local computer to Github every now and then.
The purpose of this write up is to guide you through how you connect Github to your local directory on your computer (windows) so you can send your latest code changes to Github
What we will be looking
In this article we will look at:
- Creating a repository on GitHub
- How to link to your GitHub account to your local directory on your computer (and get your repository codes to your local directory
- Create a new file on your local directory
- Check the status of your local directory with that of your Github account
- Commit changes on your local directory to Github
- Finally send the changes to Github
Creating a GitHub Repository
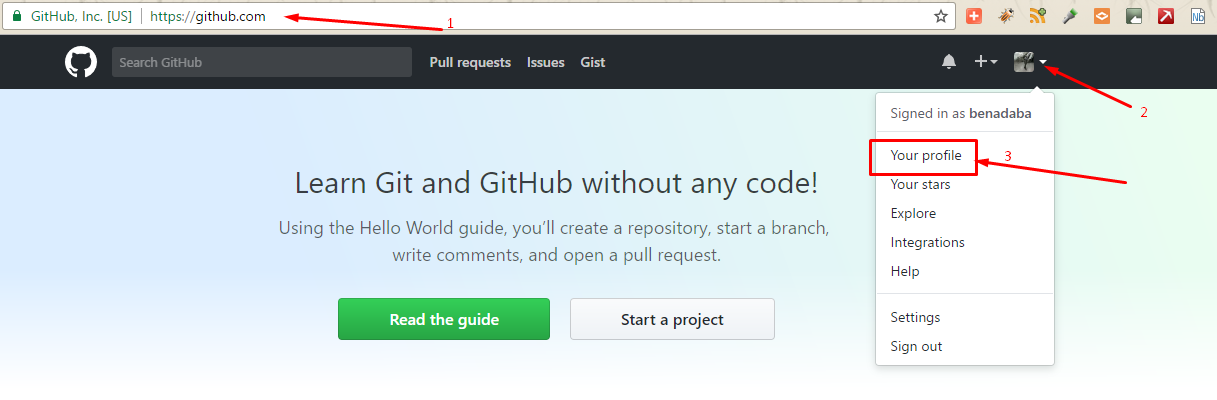
- Go to Github.com, create and account and go to profile by clicking on the arrow next to your profile icon in the far right hand corner
- On your profile page, click on Repository and then the “New” button to start creating a new repository

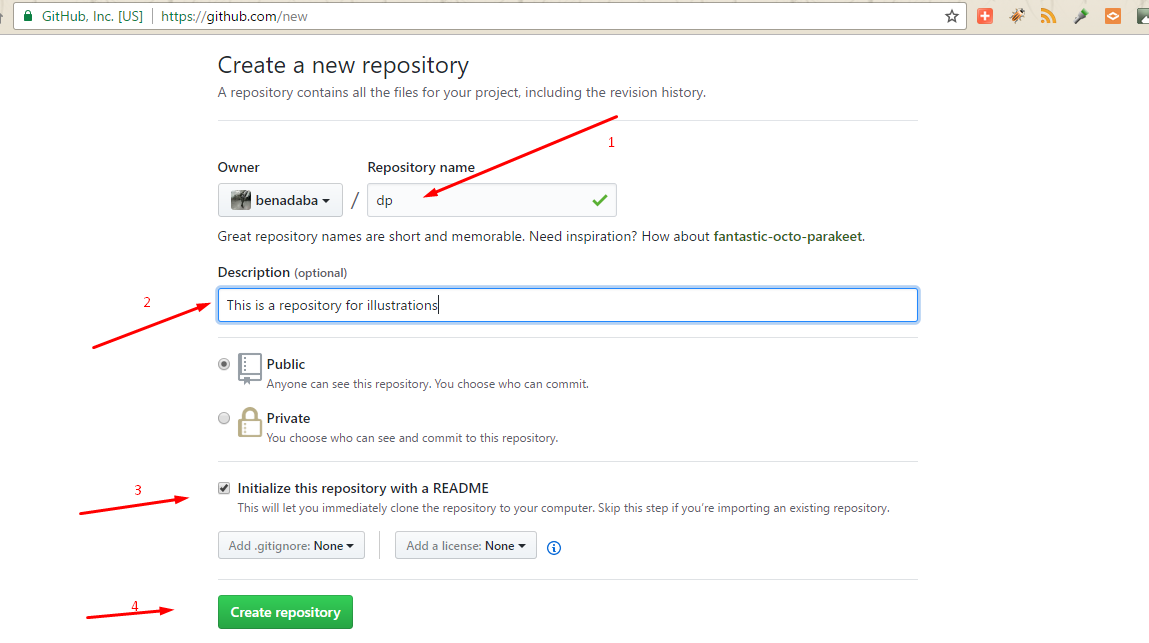
- Click on the “New” Button and enter the appropriate details as in the image below and click on “Create Repository” button to create your repository
- You will find your newly created repository along these lines

Install Git
We will be accessing Github from command line and for us to be able to do that we will need Git which comes with Git Bash ( a Command Line Interface, CLI) that we can use to access our remote GitHub and its repositories.
Download and install Git from here
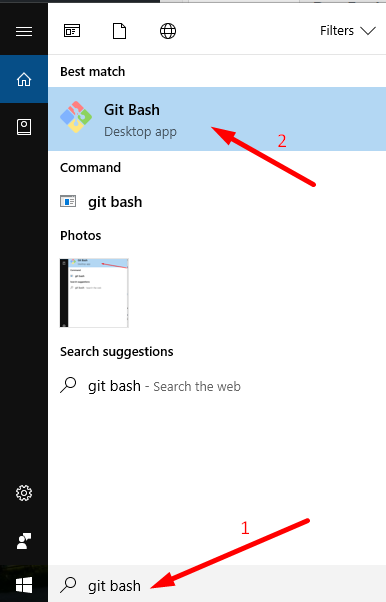
- After installation, open Git Bash
-
- Now we will need to connect our Git Bash interface to GitHub
- Let’s tell GitHub the name we will like to appear on our Github account everytime we make changes :
1git config --global user.name "Type Your Name Here" - Now let’s tell Github what email address we will use for our Github account(it has to be the same email address we used to create our Github account). We will use this command
1git config --global user.email "Type your emailaddress here same as the one on your github account" - Now that we are able to talk to Github, let’s try and get access to the “dp” repository we created on GitHub earlier on.
- To do that , let’s create a normal folder on our local computer where we will put all the Github dp repository contents. We can call it same name as the Github respository – in this case “dp”
- Let’s make a normal directory from our GitBash command line using this syntax
1mkdir ~/dp

- The “~” means your home directory. Which means we are creating a folder called “dp” in our home directory. Of course, you can create it any other place you want on your PC
- Now let’s navigate into our newly created directory “dp” by using the command “cd”
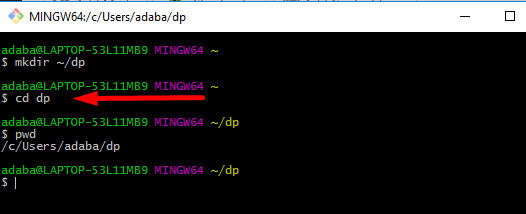
1cd dp - Now you know your “dp” folder is just a normal folder like any other Windows folder. Now, let’s initialize this normal folder to a Github special folder so that both Windows and GitHub will recognise this folder as a folder that Github can communicate with. We will do the following command:
1git init

- Now if you can visually check the folder you will see a git folder initiated and dropped in the your folder
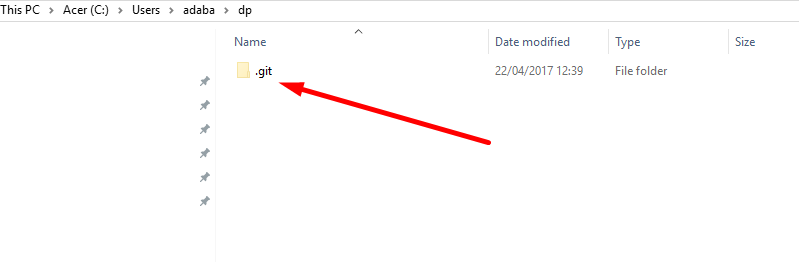
- Now your local dp folder is ready to communicate with GitHub remote repositories
- Now lest’s point this our local folder to our GitHub repository. We will do this using this command
1git remote add origin https://github.com/username/yourproject.git - Now that we have pointed our local directory to the remote GitHub directory, let’s us get the content of the remote directory to our local directory. There are several methods but let’s use this command
1git pull origin master

15. Now if you check the local directory it should have the README.md file which was on our remote GitHub repository now inside the local directory 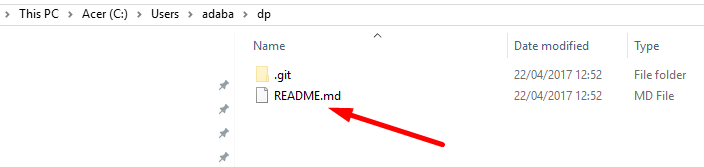
Pushing Files to GitHub
Now that we can pull files from GitHub let’s see how we can upload (push ) files to GitHub
16. Let’s create a markdown file just like our README.md (file with dot md extension) . We will create it from the command line and give it the name: dpFile.md. We will use this command
|
1 |
touch dpFile.md |

17. This file will be created in your local dp folder and you can use any text editor like Notepad, Notepad++ to edit it
18. Now that we have added a new file to our local directory let’s see the latest status of our local directory in relation to our remote GitHub directory. We will use the command below:
|
1 |
git status |
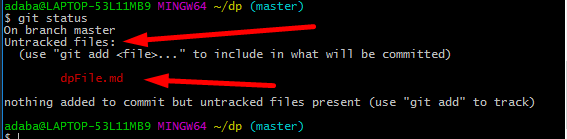
19. You can see that Git says, there is a untracked file, which means there is a file in our local folder which our remote directory knows nothing about, hence we will need to notify our remote GitHub that we have some files in our local directory which we may send to it in future. In other words, we need to align this new file in the index of files which can be uploaded to GitHub remote directory. We will use the command
|
1 |
git add . |
20. Now let’s check the status again

21. Now GitHub is aware of our new File being added to our local directory.
22. Now we have to have make this new file or changes to the local directory “permanent” ( in other words accept or save the changes) and we will use the commit command as follows:
|
1 |
git commit -m “New File: dpFile added” |

23. Now let’s upload our changes to our remote GitHub directory . We will use the push command as follows
|
1 |
git push origin master |
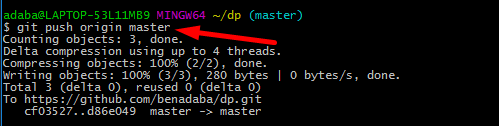
24. Now if you check your remote GitHub “dp” repository you should see the new dpFile.md uploaded to the repository 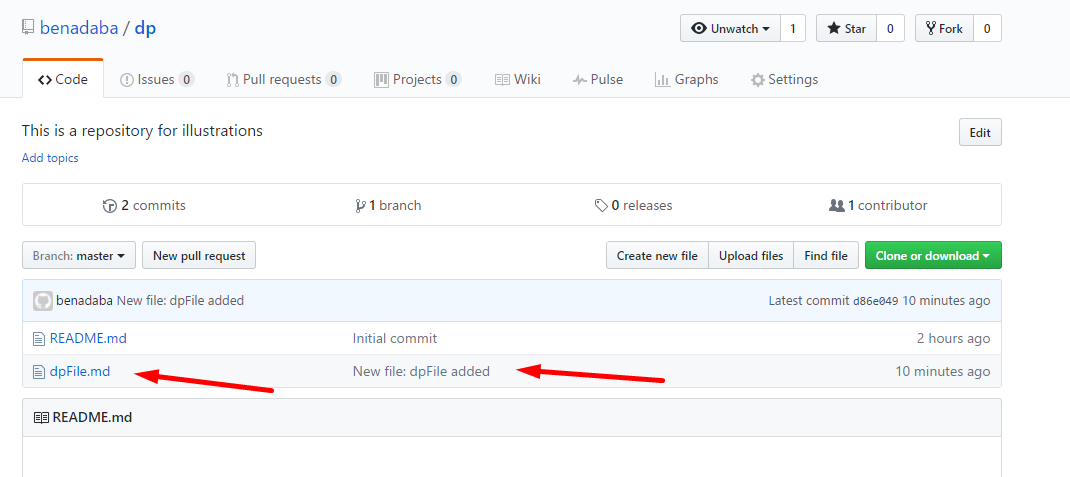
Congratulations! You have uploaded your local changes and New Files to your Remote GitHub account.
If you have any questions or comments please leave in the comment box below
Summary of what you learnt
In this article you learnt about
- Creating a GitHub repository and initiating a README.md file
- Creating a local directory and making it GitHub ready and linking it to your GitHub remote repository
- Creating a new file on your local directory
- Checking the status of your local directory with respect to your remote GitHub repository
- Committing changes on your local directory
- Finally sending the changes to your remote Github account
Do you find or think GitHub is really useful and needed in our studies and work career? How has it helped you?
I will like to hear your experience in the comment box below.
Resources:
- Data Tool on Youtube has some really good tutorials on GitHub
- A good and comprehensive GitHub tutorial for beginners
- Download Git