Getting Python Spyder Anaconda IDE To Work Using Virtualenv
If you have some Python scripts which rely on some packages that need a different version other than the version your Python Spyder uses, you can simply use Python Virtualenv to run Spyder IDE .
This will save you a lot of headache and you can simply continue with your development projects.
This tutorial will guide you through how to run Spyder Anaconda IDE from Python’s Virtualenv
- Install the versions of Python you want to use. In my case, Python 2.7 and Python 3.5 (Python 3.5 is the default my Spyder uses so i will only install 2.7)
- Set the appropriate environment Variables.
- Note the User Environment Variables take precedence over the System variables
- Create Virtualenv environment for Spyder in my case I created it for Python 2.7 by calling from command prompt:
-
1conda create -n myenv python=3.4 anaconda
This will create virtual environment to virtualenv. To activate it :
1source activate myenvAnd now to run Spyder with Python 3.4 just type:
1spyder - the above instruction is from stackoverflow here and it is further explained below:
- Replacing Python 3.4 with Python 2.7 (or the python version you want to install) and give it appropriate name , replacing myenv with the name you want, eg spyderenv
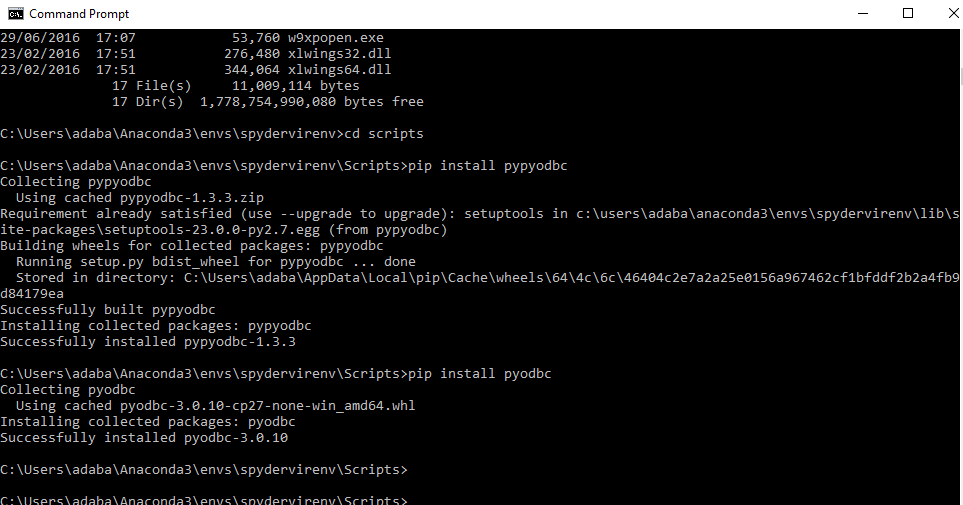
- Once it is installed , in my case (\Users\adaba\Anaconda3\envs\spydervirenv\Scripts>) navigate to that source , as in the directory path, and activate the virtualenv, by calling activate and then the name of your virtualenv , hence “activate spyderenv”

- You can double-check which python was used for the spyder virtual environment by typing python -V at the command prompt (in the activated virtualenv)
- You can install any modules or packages you want by calling pip install inside of your activated virtualenv (spyderenv)
- You can finally launch spyder from the virtualevn with the Python version you want by simply typing spyder at the command prompt
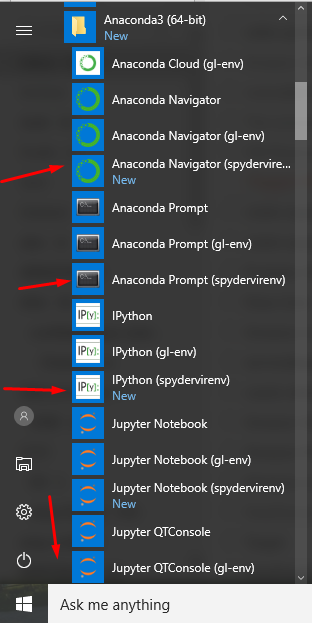
- You can also access it from your windows All Programs in the Start Menu

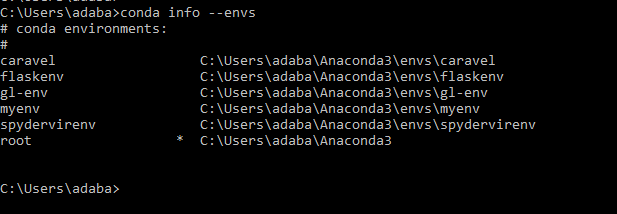
- And if you want to check all available virtualenvs you have created, you can list all discoverable environments with `conda info –envs` at the command prompt

- The other option will be to “have to path out to python.exe, but it seems that in Linux/OS X you just path to the folder. Example: Windows: virtualenv -p <PATH TO PYTHON.EXE> venv
1virtualenv -p
venv Creates a virtual environment in subfolder “venv” in current directory.”
This is courtesy of the stackoverflow comment by “Mike Davlantes” here

- Hope this helps.


